
Halloween fun!
- Oct 10, 2016
- 16 min read
This is the first post with our new additions to the collaboration group! What a fun month to start with... October! Halloween! Costumes! Candy! Crazy! All products listed are Motives unless otherwise listed. I hope you'll enjoy.
Makeup Artist - Jacqueline Menconi


I never go big for Halloween because, if I'm being completely honest, I'm lazy & not too creative when it comes to character makeup! Since I love you so much, I ventured out of my comfort zone a tad to give you Elvira. I hope you like it!
Skin Prep
I used Skintelligence® Hydra Derm Deep Cleansing Emulsion to wash my face and then generously sprayed Skintelligence® pH Skin Normalizer all over. I then massaged Lumière de Vie® Serum Concentrate and let it absorb into my skin for a few moments before applying my Lumière de Vie® Super Crème & Cellular Laboratories® De-Aging Eye Creme. This is a WINNING combination!
Eyes
I applied a small amount of Motives® Eye Base all over my eye lids, where ever shadow would be applied. I broke out my all time favorite palette, Motives® Mavens Element, and swiped Birch all over from lash line to brow. After, I started building up the color in the crease of my lid with the Bordeaux shade (also in the Element palette). Next, I took Motives® Pressed Blush in the shade Bloom mixed with Motives® Pressed Eye Shadow After Party and layered them on top of Bordeaux, giving the crease more dimension. To finish the lid I pressed the leftover Bloom on my brush from the crease to the lash line. Just below the middle of my brows & above the crease, I pressed Motives® Pressed Eye Shadow in Rain Check. Then, on either side of Rain Check I pressed Bordeaux, just in case I didn't look ridiculous enough. LOL. Next up on the docket was the liner, which I used Motives® Little Black Dress, the backest gel liner I've ever used. I extended the inner tear ducts dramatically with the liner and lined my lower water line with Motives® Khol Eye Liner in Bare for a more wide-eyed effect. In the extended inner duct area, I pressed Motives® Pressed Eye Shadow in the color Blizzard. Last steps for eyes were curling my lashes and putting a few Kiss Triples falsies on the outer half followed by Motives® for La La Volumizing & Lengthening Mineral Mascara in Black.
Complexion
Motives® Complexion Perfection Face Primer was first, of course! After priming, I had to get a few shades lighter. To do that I took a few of the cream foundations from the Light Motives® Color Perfection Quad and warmed them up by mixing them together on a metal palette. Once they were properly blended, I took my flat top foundation brush to buff the mixture into my skin, including my neck and chest. After, I took my beauty blender and patted all over to make sure there were no uneven areas. Once my foundation was finished it was time to dust with Motives® Translucent Loose Powder. Next up was the BLUSH and lots of it! This was probably my favorite part of the entire look because I tend to stick to more subtle blushes in my personal collection. I took Motives® Pressed Blush in Runway and applied it (without tapping off the excess) in a diagonal fashion, avoiding the apples of my cheeks. I lightly dusted one of the new Motives® shimmer highlighters in the color Bombshell to my cheek bones and then added the beauty mark below my right eye with the leftover gel liner from earlier.
Brows
I used the Motives® Essential Brow Kit to fill in my brows.
Lips
To line my lips, I used Motives® Lip Pencil in the color Raisin. I blended 3 of the Motives® Mavens Mattes, Sorry Not Sorry, Rust n Roll, and a tiny bit of Dark Side.
After all that I sprayed some Motives® 10 Years Younger Setting Spray, thew my cheap wig on (that I couldn't brush without it falling apart) and I was done! Woo hoo!
Makeup Artist - Rachel Jones


Lumiere de Vie pore minimizing Serum help creates the base for this mermaid inspired look! I immediately followed with my No MOre Shine Setting Spray, to help control my oil through out the day. I then used Invisiline under the eyes, against the grain of the fine lines. My foundation of choice today was the Tender Beige Liquid Powder Mineral Foundation, to create a flawless canvas. It's a buildable formula so you can apply a couple layers to get the coverage you desire. I set my skin with the Neutral Light Photo Finished Pressed powder and buffed away with the Translucent loose powder in light. I used Peach Beige for my upper cheek bone, Lust blush on the apples of my cheek and Centerfold on the lower part of my cheek bone. I gave myself defined cheek bones with the dark shade in the 3-in-1 Contour kit. I highlighted my upper cheek bone with Starlight Shimmer Powder then went in with Island Glow to make a light halo around the sides of my face. I then used Stylee, buffed in through a patterned stencil to add some mermaid to my face. I also used Lust (a beautiful blue) through a different stencil to some fun. I then used Diamond to add sparkle over Lust and Stylee.
I used the Bare kohl pencil and the Angel kohl pencil to create an eye base. The Bare pencil was used to fill in my eye lid and the Angel Liner went in the inner eye and the brow bone. I used the Waterproof Black Eye Liner Retractable Pencil to line the upper and lower inner lash lines. I used Essence from the Illuminating Eye Shadow line on the inner third of my eye with Antique Pink in the inner upper part of my eye, the inner third of my brow bone. Pink Gold in the crease with my favourite blender brush from the Motives Pro Brush set. Mystical Eye Shadow was used on the brown bone to blend out the Angel Eyeliner. I placed WildFlower on the outer half of the mobile lid and used Fantasy on the outer V of the eye, and under the lower lash line. I then added Morganite Sparkle to my inner eye.
My brows were filled in with the Dark powder of the Motives Essential Eyebrow Kit and my eye were deliciously lined with Little Black Dress. I used the Motives Falsies in 109, applied with the Motives Glue, cause it's still available in Canada!!
On my lips I used Guava All Day Liquid Matte and Sweet Candy Illuminating Lip Shine. Everything was then set with the Motives 10 Years Younger Makeup Setting Spray. FUN!
Makeup Artist - Kinley Kay


Super easy fun Halloween look. I wanted to do something that would be easy for clients to recreate at home as well.
I started with Micellular cleanser to create a perfect, smooth, hydrated canvas. I then hopped right to it with Mineral Liquid Foundation in Linen and buffed it into my skin. I set the foundation with Translucent Powder and contoured with 3-in-1 contour kit. I skipped blush this time because I wanted more of a natural, carved look.
For the black sketching I used Patent Black Liquid Liner by MOTIVES. And I just started by overfilling my eye brows and lining them. Carving out my face and cheek bones were pretty easy as I just followed my natural cheek bones.
I used Sorry Not Sorry Liquid matte lipstick for that luscious red. And finished outlining my lips with the Liquid eye liner.
The blue tear drops were created by blending my blue and white toner for my custom blend kit.
My eyes were shaped with the Liquid Eye Liner and LALA mascara.
And there ya have it! Super quick and easy Halloween Fun!
Makeup Artist - Leigh Raeder


This was a fun project! I decided to transform myself into a spooky cracked doll. This project was out of the box for me because my focus is usually the everyday woman, but I loved getting creative on this level. I have to give a shout out to my friend Samantha Papa of Samantha Lauren Photography for taking these amazing pictures. We had a blast and laughed until we had tears!
I started by mixing up a Motives Custom Blend Liquid Mineral Foundation because I wanted to make my skin much lighter and porcelain like, so I added a lot of white toner. I applied it with a Motives foundation brush and stippled it with a blender sponge.
I applied Motives Eye Base over my entire eye lid, and to make my eyes look bigger, I used the Motives Kohl Eyeliner-Electric Blue to outline an area underneath my eyes. I filled the area in with Khol Eyeliner-Angel.
I chose the Motives Dynasty Palette for my eye and because most of my doll always had blue eye shadow, I used "Cleopatra" on my entire mobile lid. I used "Aphrodite" in the crease.
I lined my upper lid with the Motives Lux Precision Eyeliner-Black and continued to outline my new lower lid
I used 2 sets of Motives Lashes #109-1 set for my real lashes and glued the other set on my new lower lid using Duo Lash Adhesive-clear. I blended my upper lashed into the falsies with Motives for LaLa Mineral Mascara-black.
I did a light contour using the contour in the Motives 3 in 1 contour kit, and applied Motives Pressed Blush-Porcelain Doll (Ha-very fitting) to my cheeks.
I added freckles by using a fine brush dipped in Motives Custom Blend Toner-Yellow Brown.
I filled in my brows with Motives Waterproof Eye Brow Pencil-Dark Brown.
I started to outline where my cracks would be using "Nefertiti" Eye Shadow also in the Dynasty Palette. I then created the cracks with Motives Gel Eyeliner-Little Black Dress using Motives Angled Brush. I used Motives Khol Eyeliner-Angel in some areas to add dimension the cracks.
I sealed everything with Motives 10 Years Younger Setting Spray and completed my look by applying Motives All Day Liquid Stick Matte-Dragon Fruit.
Makeup Artist - Rachel Lorraine


If you can be an evil mermaid, always be an evil mermaid! IN full disclosure, I actually achieved my look in just a little over 1 hour, including hair! I just applied everything over my everyday makeup that I had worn to work. It doesn’t have to be so serious…haha.
PREP:
Skintelligence pH Normalizer – sprayed generously all over face
Cellular Laboratories® De-Aging Body Balm – applied with fingertips, applied generously all over face and neck
Lumiere De Vie Needle Free Serum – Applied with finger tips, concentrated application on forehead (I got creases ya’ll!) between brows, around eyes and mouth
Cellular Laboratories® De-Aging Eye Creme– Applied with finger tips around eyes
EYES:
Motives Eye Base – applied with flat eye brush all over lid (from brow to lash line)
Brows: Blackout Eyeshadow
Lustrafy Mascara in Black
Motives® Waterproof Eye Pencil – Applied to lower water line and over top lid to darken shadows
Motives Luxe Precision Eye Line in Jet Black to create the veins under my eyes
Lashes are Ardell costume lashes that I picked up from Sally’s
FACE:
Used a hair net for wigs that I picked up from Wal-Mart for like $2, and wore it on my face. Then applied a mixture of the following shadows with a sponge to create the scales: Oasis, Tripped Out, Moonlight and Blackout.
Used the Blackout eyeshadow to create more shadows around the hairline and down my nose, and cheek bones
Used sequins and gems that I picked up from a local craft store and glued them on my face (and own my neck) using eyelash glue
LIPS
Color Perfection Quad – Lighter colors to nude out my lips and set with the Motives Translucent Loose Powder
Motives Waterproof Eye Pencil in Black to the inside and center of my lips, blended out with my finger tips and set with the Blackout eyeshadow
Makeup Artist - Jennifer Halma


The October Halloween Edition collaboration project! Cheetah!
Skin
Prepped the skin with Skintelligence pH Skin Normalizer
Complexion
I used Motives Custom Blend Foundation to give Marisa (my model) a matte finish.
I concealed with Motives Cream Concealer in Amber to highlight under the eyes
Next, I applied Motives Loose Powder in Medium with a powder brush to set the foundation and under eye concealer.
Eyes
I applied Motives Eye base on the movable eyelid and all the way up to eyebrow. I used the lightest matte shade from the Motives Element Palette in Birch to set the base and provide a blendable base. I used Motives Cosmetics eyeshadow in Cappuccino with a fluffy crease brush. Next I applied Motives eyeshadow Bedroom Eyes in the outer v of the eye and then blended up and outward for an uplifting cat eye effect. I then applied motives eyeshadow in Blizzard in the inner movable eyelid and brow bone. I used Motives gel eyeliner in Chocoholic on the bottom eye line.
Cat nose
This part was fun! I used Motives Gel Eyeliner in Little Black Dress with an angled brush just drawing on the cheetah nose.
Whiskers/Lips
Little black dress on the top line of the lips and extending it outwards and up to create the snout. I used the same gel eye eyeliner to create the dots on the snout.
For the lips, we used Motives Mavens Mattes in Daddy's Girl with a Motives Lip Shine in Celeb and a touch of eyeshadow in Antique Gold on the pout for a 3D effect.
Cheetah marks
Motives eyeshadow in Antique Gold.
Motives Gel Eyeliner in Chocoholic in random c formations on top of the Antique Gold shadow.
What do you think of this Cheetah look for Halloween?
Makeup Artist - Monina Wright


FACE 1. Mixed liquid custom blend in white, blue and small amount of green 2. Apply all over face and neck, except eyelids and lips
EYES 1. Apply white custom liquid all over lids 2. Using a round brush apply any blue Motives shadow of your choice around orbital eye socket. You should look like a panda 3. Using a liner brush, apply Little Black Dress Gel liner along the inner and out portion of the blue shadow. This creates the false Sally eyelids 4. Using a pencil brush and LBD, create the false small eyeball on the center of your eyelids 5. Choose thick jagged lashes and cut into pieces. Then apply with glue between the false eyelids you just created
STITCHES 1. Using your liber brush and LBD create stitches along the forehead, mouth, neck and chest area
LIPS 1. Routine entire lips with LBD 2. Choose the darkest red Motives lip color of your choice and apply all over lips for an ombre effect.
HAPPY HALLOWEEN!!!!
Makeup Artist - Ash Mac


Face- (all over)
•LDV pore minimizer
•Primer
Skull face-
•Drawn down the middle with khol eyeline in bare
Dark area:
•eye base around the eye.
•Filled in with Little Black Dress, and raven in the element palette to set Light area:
•custom mineral liquid toner in white, set with custom mineral powder in alabaster
•luxe precision eyeliner to create cracks and shaded
Fairy face-
Eyes:
•Eye base •Little black dress from lash line to crease
•Eyeshadows in after party, fantasy and then eye illusion in Odyssey on the lid. blended birch from the elements palette from crease to brow.
•Luxe precision eye liner in jet black
Cheeks:
•Custom blended colors for purple/blue/pink contour using rose quarts, lapis, tourmaline, onyx, and alabaster
•Highlighted with mystical eye illusions shadow
•All day liquid matte in concord with rose diamond highlighter and karma glitter pot
•Gold flake and diamonds from the Gold Sparkle Stack halloween makeup (Walmart)
Makeup Artist - Jayme Kauth

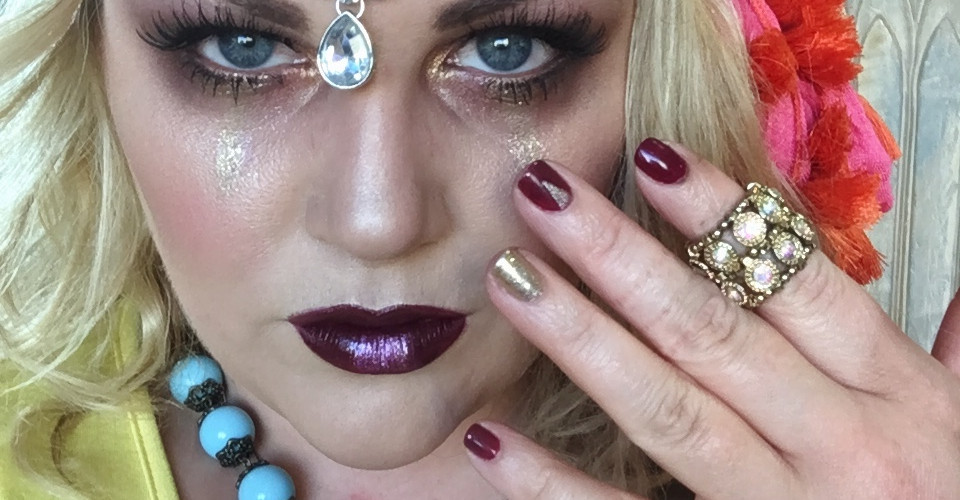
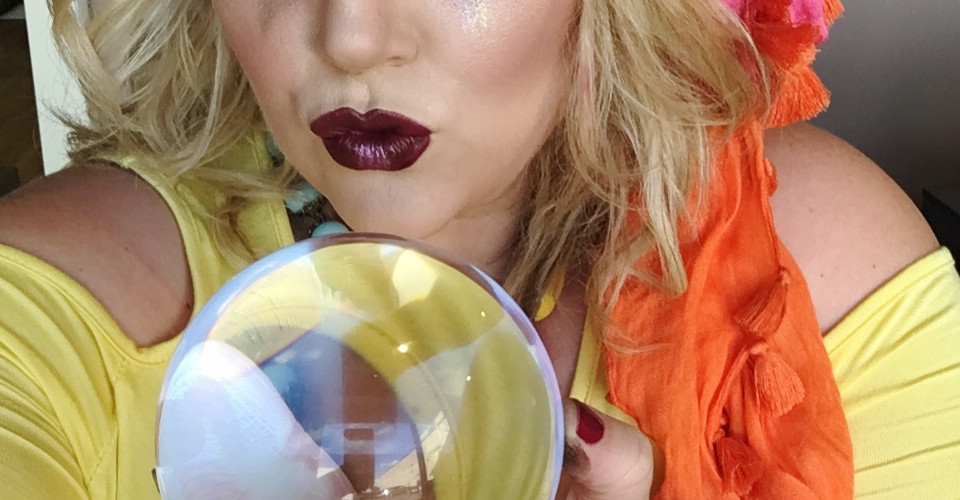


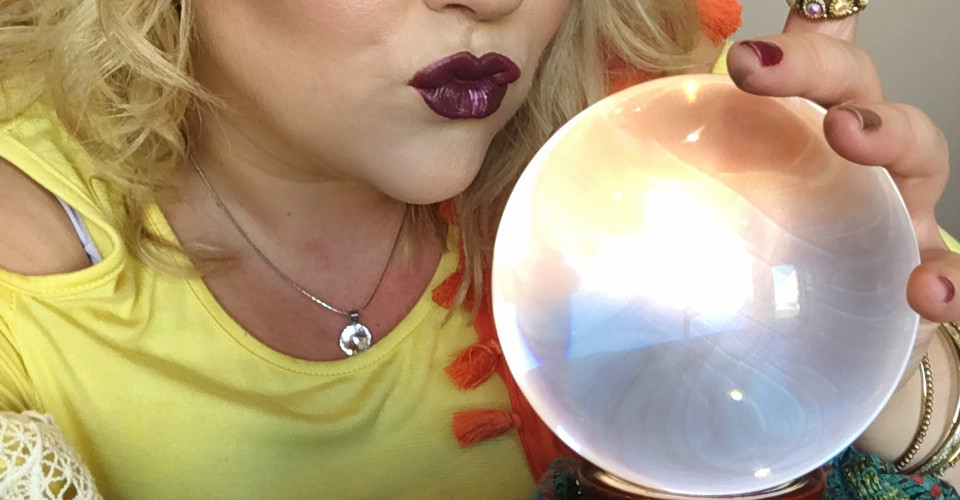


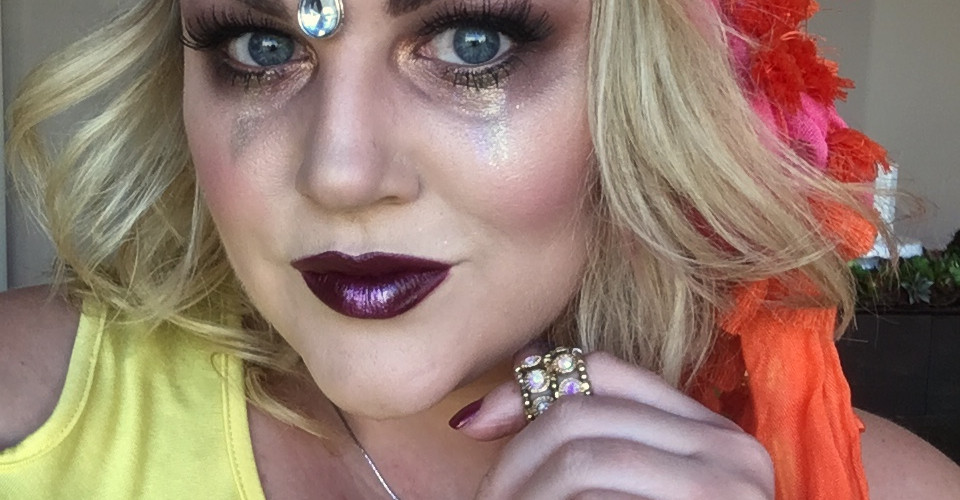


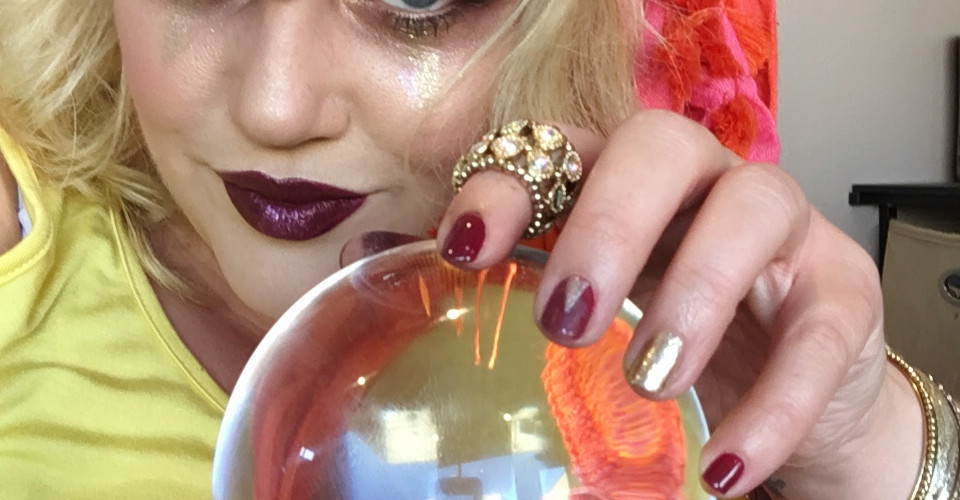


Skincare, so important! 1. I did a quick cleanse with my gentle, lotion-like Skintelligence cleanser 2. Quick spritz of Skintelligence pH normalizer to prep my face for skincare 3. I have naturally red/reactive skin so I'm in LOVE with the Lumiere de Vie Illuminating Fading Fluid as it calms my pinkness and evens tone. 4. As the weather chills my skin drys, so I put on a healthy layer of the Lumiere de Vie Rejuvenating Cream 5. Last but certainly not least I out a couple pumps of the Lumiere de Vie Pore Minimizing Serum to blur my imperfections and prime my skin for foundation! Onto the Gypsy Glam... 1. I was wanting to keep my skin creamy-white for the look to show the drama of lips and eyes, I used the Liquid Mineral Foundation in Linen, I applied it with a sponge because the less rubbing the better for my pink skin! Followed by Loose Illuminating Translucent powder in Light to set my foundation. 2. Creating some cheekbones was quite easy with my contour, I choose the 3-in-1 powder kit. I focused mostly on the cheekbones for this look! I topped my cheekbones with some Shimmer Starshine powder for a highlight, these shimmer powders are FABULOUS, the perfect glow. Peony Blush was swirled on the apples of my cheeks for a pretty finish of the skin. 3. Brows, Baby! They are important everyday but especially when your a fortune teller, I created a darker, larger brow than normal. 4. Motives Eye Base is a staple in my chair, I applied a very thin layer to my upper and lower lid to ensure beautiful stand out shadow. 5. The motives Element shadow pallet has stolen my hear and has been running with it since its release, so except for this dramatic eye look! I started with the medium brown colors and swept them from my upper lid all the way around to my lower lid, keeping the tear duct and brow arch clean. I used lots of Bordeaux right over my previous shadow to gypsy it up! I dabbed some gold, shimmer shadow in Bling in the center of my upper lid as well as my lower lash line and tear duct. I placed a bit of the brown/black shadow also from the Element kit on my outer corners to create some depth. Blend, blend, blend! I figured if you're reading people fortune some glitter is in order and motives Gem Sparkles are just the thing! I created a "v" under both eyes using the glitter adhesive, bam! Applied some false lashes and Little Black Dress liner, double bam! 6. Lips required some depth, I mixed Long Wear Liquid Stick in Seduction with motives Matte in Dark Side, I dabbed a bit of Gem Sparkles in the center of my bottom lip for a fancy highlight. This was a really fun look to create and I believe the Crystal Ball became my BFF while creating it! I'm just here for the Boo's!
Makeup Artist - Jessi Jewel


So to start off this look you need to prepare the skin before any makeup application and I used the Skintelligence Deep Cleansing Emulsion, then moisturized with the Pentaxyl since the fall is now here and my skin personally tends to be dryer but of course if you're oily then use any moisturizer that works best with your skin type.
To prepare the eyes:
Before any eye makeup or primer you first need to prepare the brows to be glued down. All you need to do for this step it take plain old alcohol (50 to 70% no higher than that to prevent irritation) and remove ANY AND ALL oils from the skin around the brows, and the actual brow hair and go all the way down to the root of the brow hairs by rubbing AGAINST the direction of hair growth. Once it is completely dry I then glued my brows down using the glue stick method (you may use any method you prefer but I personally for an easier removal like to use the glue stick) and once they are laying completely flat, powder the brows which I used the Motives , "Loose Translucent Powder". After the brows have been powdered now take the Motives, "Liquid Correction Concealer", and in a DABBING motion press the concealer over the eye brows. Remove any excess by either tapping with a dry sponge or tissue, then once the concealer is on, powder them again in a dabbing motion and never rubbing or swiping. Final step in preparing the eye brows is to finish by taking the Motives Luxe Creme Shadow in, "Gold Dust", and rub over the brow hair in the SAME DIRECTION AS THE HAIR GROWTH and then set that with the pressed eye shadow in, "Whipped Cream". and then the brows are done! After that is done then prepare the rest if the eyes by basing them with an eye shadow base, and glue down the eye pieces.
Eye shadow:
Since the whole brow area is now already set and powdered with the, "Whipped Cream", shadow. Now on the entire eye lid from lash line to crease place the, "Green Apple", pressed eye shadow. Then to define the eyes and crease I first took the Motives pressed shadow in, "Vino", and lightly dusted that on the inside portion of the upper crease closest to the nose and blended towards the middle and up to the eye pieces. Then take the Motives Khol Pencil in, "Green Envy", and draw in the crease slightly higher then the actual crease and also smudged the pencil along the lower lash line. Top those areas with, "Forbidden", eye shadow and blend well. Then apply black eye liner on the waterline, inner and outer corners and also the uppr lash line. Then define the outer portion of your eyes and eye liner with a little, "Onyx", eye shadow. Finish the eye design by taking a glitter adhesive and tapping the inner corners of the eyes with the Motives Gem Sparkle in, "Citrine", and of course applying your false lashes and mascara.
Complexion:
Apply Motives Perfection Face Primer all over the face, then apply your foundation (I used the Motives Supreme Creme Foundation in, "Medium Light") all over the face. Following that apply your cream contours by taking the Mavens Sculpt Series Pallet (I used the "Ice" pallet but if the "Fire" one suits you better then use that) and sculpt out your features you want to bring out most. I personally contoured my cheeks, nose, and forehead. Apply on top of the cheek contour shimmer stick in, "Island Glow" and blend well. Next conceal the under eyes with the a concealer lighter than your skin tone and follow that by setting the entire face and under eyes with the setting powder of your choice.
After the face is powdered then go over your cream contours with a powder contour color which I used the color in the Motives, "Shape and Sculpt Duo". Then apply, "Miami Glow", bronzer to the cheeks and forehead and finish the apples of the cheeks with a blush that has a more redish tone (I layered pressed blushes in "Runway" and "Flushed". Finish the complexion by bringing out the highest highlights of the face (I used the "Whipped Cream" eye shadow and highlighted my entire T zone) with a light shimmer powder.
Lips:
Finish off this look with a pow red lip color! So first line the lips with a pencil at least a shade darker than your lipstick (I used the "Morning Coffee" lip crayon) and top the lips with your favorite bright red lipstick and my personal favorite is the Motives Ultra Matte Lipstick in, "Sex Pot".
Makeup Artist - Nicki Baman


Eye:
Eye base Behind the scenes palette Red carpet palette Lustrify mascara "I do" palette for the brows Face: Face perfecting primer Linen liquid powder mineral foundation mixed with green toner Limitless eye illusions eye shadow Elements palette for blush Red carpet palette (green shade) for highlighting nose and cheekbone Concord liquid lipstick Dragonfruit liquid lipstick 1. I covered my eyelids up to my brow bone with eye base. 2. I applied the purple, gold, and blue eye shadows from both the Behind the scenes and Red carpet palettes. 3. I filled in my brows and created an angular shape using the black shadow in the "I do" palette. 4. I lined my upper and lower lash lines with LBD gel liner and created a winged liner. 5. Before putting on my green foundation, I applied the primer. 6. I created the contour using Limitless eye shadow on the cheekbones and nose. 7. I highlighted those areas with the green shade from the Red carpet palette. 8. I used the maroon eye shadow from the Elements palette as a blush 9. I outlined my lips with Concord and filled them in with Dragonfruit liquid lipstick. 10. I finished off by setting my face with 10 years younger setting spray.
Makeup Artist - Sophia Chau Hoang


Moisturize face with Timeless Prescription moisturizer
Motives Perfecting Face Primer Motives Invisi-Line Liquid Powder Foundation in Almond
Mavens palette in Fire to contour and highlight
Eyeshadow to create the wooden effect: chocolight, cappuccino, black steel Piece of wood around mouth : colors as above + onyx
Eyebrows, eyeliner: Gel liner little black dress
Eyes: Eyeliner Angel chocolight + cappuccino + cream fresh
Lips:
Lip liner: Coral Kiss Lipstick: Girl Talk
Loose powder to set areas: Light for highlight Medium for contour Blush: lipstick "Girl Talk"
Set with 10 years younger
Comments